How to Maintain Freshly Painted Walls: Tips from Vista Painters
March 28, 2025
How Del Mar Interior Painters Can Help Make Your Home’s Interior Look New Again
April 14, 2025
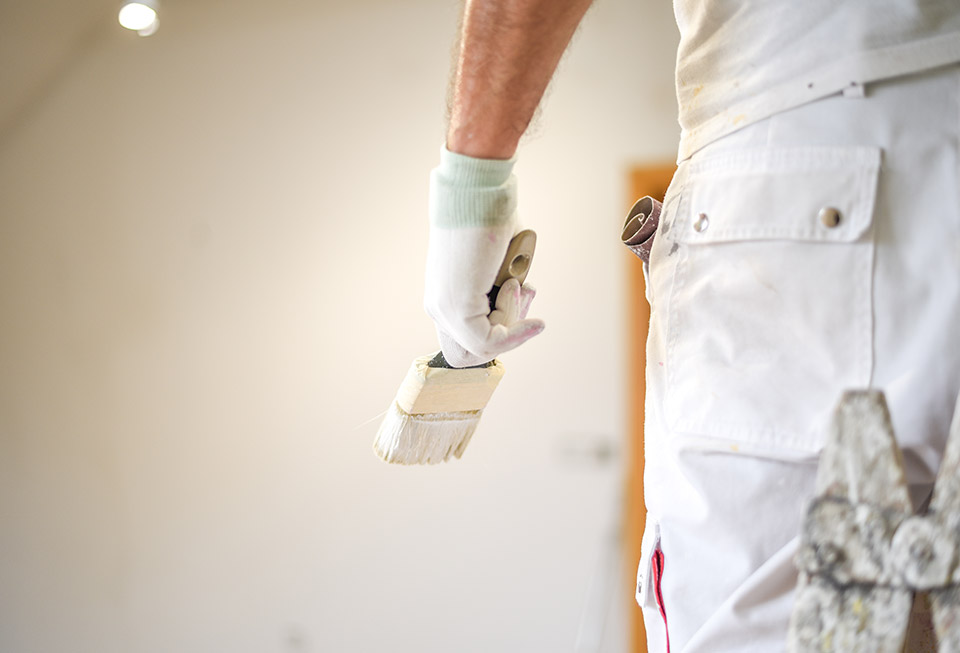
When it comes to sprucing up a room, few things can make a bigger impact than a fresh coat of paint.
Whether you’re redoing a small accent wall or giving an entire room a makeover, painting is a simple and affordable way to transform your space. However, while it seems straightforward, achieving that smooth, flawless finish without streaks, drips, or roller marks can be a real challenge. It’s easy to find yourself staring at your walls after the job is done, wondering where you went wrong.
Luckily, with the right techniques and a bit of know-how, you can avoid these common problems and achieve the kind of results that professional Santee painters are known for. From proper prep to selecting the best tools and techniques, we’ve got you covered with insider tips that will help you avoid the mistakes that lead to uneven paint jobs.
We’ll walk you through everything you need to know to avoid those pesky streaks, drips, and roller marks. By the end of it, you’ll be ready to tackle your painting project with confidence, knowing you’re equipped with the right skills for a professional-looking finish.
1. Why Streaks, Drips, and Roller Marks Happen
According to Santee painters, it’s helpful to understand exactly why these issues crop up in the first place.
Streaks typically appear when the paint is applied unevenly or dries too quickly, leaving visible lines or variations in the color as it sets. This can happen if the paint is too thick in some areas or if you’ve allowed one part of the wall to dry before you’ve had a chance to blend it in.
Drips usually happen when you overload your brush or roller with too much paint. The excess paint then runs down the wall in streaks, leaving an unsightly mess.
Roller marks are caused by inconsistent application. This often happens when you don’t properly load the roller or when you don’t blend your strokes together well enough. It can also occur if you’re working with paint that’s drying too quickly or you’re using low-quality rollers that leave behind texture.
Now that we know why these issues happen, let’s talk about how to avoid them and set yourself up for success from the get-go.
2. Proper Wall Preparation: The Foundation for a Flawless Finish
Santee painters will tell you that a perfect paint job starts with the prep work. Even the best paint and tools won’t guarantee a smooth, flawless finish without proper preparation. You need to ensure that your walls are in the best shape possible before you even think about picking up a roller or brush.
One of the first things to address is the cleanliness of your walls. Over time, walls can accumulate dust, grease, or other residues that can interfere with paint adhesion. Cleaning your walls thoroughly is essential for ensuring the paint sticks properly and evenly. Use a damp cloth to wipe down the surfaces, and if there are any grease spots or stains, consider using a mild detergent to clean them off. Make sure to let the walls dry completely before moving on to the next step.
Once your walls are clean, you need to deal with any imperfections, like cracks, dents, or holes. These can really stand out once you apply paint, so it’s worth taking the time to patch them up. Use a high-quality spackling compound to fill in any cracks or holes, and once the compound has dried, sand it smooth. This ensures you’ll have an even, flawless surface to work with. Skipping this step could result in imperfections showing through the paint, which no one wants.
Sanding is another key step in prepping your walls. While you may have repaired cracks and filled holes, sanding the entire surface (or at least rough spots) ensures that the paint adheres well and gives you a smoother finish. Be sure to use fine-grit sandpaper and wipe down the walls afterwards to remove dust.
Lastly, Santee painters recommend using painter’s tape, which can make a huge difference. When you apply painter’s tape along the edges of your walls, trims, baseboards, or ceilings, you’ll get crisp, clean lines without worrying about smudging paint onto areas you want to protect. Be sure to press the tape down firmly to avoid any paint bleeding through.
3. Choosing the Right Paint and Tools
The paint and tools you choose will have a significant impact on the quality of your paint job. It’s worth taking the time to pick the right materials for the job.
When it comes to selecting the right type of paint, consider the finish you want. Matte, satin, and semigloss finishes all have different properties, and the one you choose should align with your needs. Matte finishes work great for hiding imperfections, but they can be more difficult to clean. Satin and semigloss finishes, on the other hand, offer a bit of sheen and are easier to maintain.
Quality paint is another crucial element. While it may be tempting to go for a cheaper brand, opting for high-quality paint will save you time and effort in the long run. Good quality paint tends to go on more evenly, reducing the chances of streaks and drips. Plus, it usually requires fewer coats and provides better coverage, making your job easier and the result more durable.
Don’t skimp on your tools, either. Choosing the right rollers and brushes for your wall texture is key to avoiding roller marks and achieving an even finish. If you have textured walls, opt for a thicker nap on your roller, while smooth walls can be tackled with a shorter nap. For cutting in around edges, a high-quality brush will make a difference, especially for detailed areas like corners and trim.
And let’s not forget about the importance of a good paint tray. A paint tray with a built-in grid helps remove excess paint from the roller, preventing drips and ensuring that your roller is evenly coated for a smooth application.
4. The Importance of Primer
Many DIY painters skip the primer, but using one is essential if you want to achieve a smooth, even finish. Primer helps paint adhere better, provides a consistent base, and can even prevent streaking.
Using a primer is especially important when you’re painting over dark colors or new drywall. It ensures that the topcoat goes on evenly and helps with coverage, meaning you won’t have to use as many layers of paint.
When choosing a primer, keep in mind that there’s a debate between white and tinted primer. Tinted primer is often the better choice when you’re painting over a darker wall color or when you want to improve the color payoff of your topcoat. It reduces the number of coats you need to apply, which can save you time and effort.
5. Mastering the Rolling Technique
Once your walls are prepped, and your paint and tools are ready, it’s time to roll. But it’s not as simple as just rolling paint onto the wall. There’s a technique to get it right.
Start by loading your roller with paint, but don’t overload it. You want the roller to be evenly coated but not dripping. A good rule of thumb is to roll the paint onto the tray’s grid to get rid of any excess.
The ‘W’ or ‘M’ pattern is the best technique for even paint distribution. Start by making a large ‘W’ shape on the wall, and then fill in the gaps without lifting the roller. This helps prevent streaks and ensures a more consistent coat of paint. It’s essential to work in sections and always blend each section into the next while the paint is still wet to avoid lap marks.
Another important thing to keep in mind is to avoid overloading your roller. Applying too much paint will cause drips and uneven coverage. Reload the roller as needed, but keep it light to ensure a smooth finish.
6. Avoiding Drips and Paint Runs
Drips and runs can be frustrating, but they’re easily preventable. To avoid this, Santee painters recommend you roll off excess paint before you apply it to the wall. If you’re working with a lot of excess paint on the roller, it will inevitably drip.
Also, be mindful of the pressure you’re applying while rolling. Too much pressure can cause roller marks, while too little pressure can result in uneven coverage. The key is finding the right balance so the paint goes on evenly and smoothly.
If you do happen to get a drip, don’t panic! Simply fix it before it dries. Use your roller or brush to smooth it out, and you’ll have a flawless finish in no time.
7. Preventing Roller and Brush Marks
Sometimes, roller and brush marks are unavoidable, but with the right approach, you can minimize them.
One of the main culprits behind roller marks is cheap, low-quality rollers. These can shed lint or leave behind texture that ruins an otherwise smooth finish. Investing in a good-quality roller will give you a smoother application, reducing the chance of marks.
Feathering out roller marks can also help. Before the paint fully dries, roll lightly over any visible marks to blend them in. If you’re using a brush for details, apply long, smooth strokes and avoid going back and forth too much, as this can leave visible brush strokes.
Another common mistake is dry rolling. This happens when the roller runs out of paint mid-stroke, leaving uneven textures. Reload your roller frequently to avoid this issue.
8. Managing Drying Time and Environmental Factors
The temperature and humidity levels in your environment can significantly affect how your paint dries. Ideally, you want to paint when it’s not too hot or too cold, as extreme conditions can cause the paint to dry too quickly or unevenly.
Avoid painting in direct sunlight, as the heat can cause the paint to dry faster than you can apply it, leading to streaks and roller marks. Similarly, high humidity can slow down drying time, making it more challenging to avoid smudges.
When to Hire a Professional Instead of DIY
While DIY painting projects can be rewarding, some situations call for the expertise of a professional painter. Certain projects require specialized knowledge, tools, and skills to ensure a flawless and long-lasting finish. Below are several factors to consider when deciding whether to take on a project yourself or hire professional Santee painters.
1. Complexity of the Job
For intricate details, high walls, and hard-to-reach areas, it may be worth hiring professional Santee painters. Complex designs, like wall murals, accent stripes, or crown molding, require precision and experience to execute correctly. Similarly, high or vaulted ceilings can be difficult and dangerous to tackle without the right equipment and skills. Professional painters have the expertise to handle such tasks with ease and ensure a neat, flawless finish.
Specialized techniques, such as faux finishes, textures, or advanced paint applications, also require expert knowledge. If you’re looking for a specific aesthetic or finish that goes beyond a simple wall coating, it’s best to hire a pro who can deliver your vision with the right techniques.
2. Time Constraints
If you need to complete your painting project quickly, hiring a professional might be the most practical solution. Professional Santee painters are skilled in working efficiently and can complete the job faster than an amateur. While a DIY project may take days or weeks, a professional can typically finish the task in a fraction of the time, allowing you to move on to other parts of your renovation or enjoy your newly painted space sooner.
3. Quality and Finish
When it comes to quality, professionals offer a level of finish that’s hard to achieve on your own. Experienced Santee painters understand how to apply coats smoothly and evenly, creating a flawless surface. They know the best methods for blending paint, achieving consistent coverage, and avoiding imperfections like streaks, roller marks, and drips.
In addition, professionals can help ensure long-lasting results. Their expertise in choosing and applying the correct primers, finishes, and paints guarantees that your paint job will hold up over time and withstand wear and tear without fading or chipping.
4. Surface Preparation
Proper surface preparation is crucial for a successful paint job, and this is where professionals truly shine. They are well-versed in the necessary steps for cleaning, sanding, and priming surfaces to ensure optimal paint adhesion. Without this essential prep work, your paint job may peel, crack, or fade much sooner than expected.
Professional Santee painters will also assess the condition of your walls before applying paint, identifying any issues, such as holes, cracks, or water damage that need to be repaired. This ensures the best possible surface for paint application and prolongs the durability of your finish.
5. Safety Concerns
Painting at great heights or using ladders and scaffolding can pose significant safety risks. If you’re not comfortable with heights or don’t have the necessary safety equipment, it’s a good idea to hire professional Santee painters. Painters have the right tools, including extension poles, scaffolding, and harnesses, and are trained to work safely at height.
Also, if your painting project involves the use of specialized equipment or hazardous materials (such as certain paints or solvents), a professional will have the right training to handle these safely.
6. Access to Tools and Materials
While DIY painting requires basic brushes, rollers, and paint, professionals have access to a wide range of high-quality tools and materials that can improve the final result. For example, professional-grade rollers, sprayers, and brushes allow for smoother, more even coverage. They also have access to premium-quality paints that might not be readily available at home improvement stores, ensuring a better finish and longer-lasting durability.
Professional Santee painters also know which products work best for specific jobs, whether it’s a high-gloss finish for trim or a durable exterior paint that can withstand the elements.
7. Long-Term Results
Finally, if you’re looking for a durable, long-lasting finish with minimal touch-ups, hiring a professional is a smart choice. Professional Santee painters use high-quality paints and follow the proper techniques for application, ensuring that your walls stay beautiful for years to come. With their expertise, the need for maintenance or touch-ups is greatly reduced, saving you both time and money in the long run.
Santee Painters Can Help You Keep Your Walls Flawless
It’s also essential to give your paint enough time to dry between coats. Rushing to apply a second coat before the first one is fully dry can result in peeling and uneven coverage. Always follow the manufacturer’s instructions on drying times to achieve the best results.
Achieving a smooth, flawless paint job doesn’t have to be a stressful task. With the right preparation, quality materials, and a little patience, you can avoid common mistakes like streaks, drips, and roller marks. Remember, it all starts with properly cleaning and prepping your walls, selecting the right tools, and using the right techniques. Whether you’re a seasoned DIYer or a first-timer, following these steps will ensure that your painted walls look professional and last for years.
So, next time you take on a painting project, keep these tips in mind, and you’ll be well on your way to achieving beautiful, streak-free walls. And if you ever feel like you’d rather leave the job to the pros, Santee painters are always here to help!
Frequently Asked Questions
Below are some commonly asked questions to consider:
1. Why do I see streaks in my painted walls?
Streaks often appear due to a few common mistakes. One major cause is applying paint too thickly in one area, which prevents it from drying evenly. If you’re using a roller, overloading it with too much paint can leave thick streaks. To avoid this, ensure that you’re using a consistent rolling technique. Always roll off excess paint from your roller on the tray’s grid before starting. Additionally, ensure that you are blending your sections properly while the paint is still wet so you don’t leave visible lines or patches. Patience and proper technique are key!
2. How do I avoid drips when painting?
Drips are a common problem, but they are easily preventable. The main culprit is overloading your brush or roller with paint. When you use too much paint, gravity takes over, and the excess drips down the wall. To avoid this, always start with a light, even coat of paint and apply it gradually. Make sure to roll off any excess paint on the tray’s grid to ensure a uniform application. If drips do happen, make sure to fix them before they dry. A quick touch-up with your roller or brush can smooth them out and prevent any permanent blemishes.
3. What causes roller marks, and how can I fix them?
Roller marks appear when paint is applied inconsistently, often due to an improperly loaded roller. If the roller is too dry, it can leave streaks, while an overloaded roller can leave thick patches. The best way to fix this is to use a high-quality roller that suits your wall texture. Make sure to always blend sections together while the paint is still wet, using the ‘W’ or ‘M’ rolling technique. If roller marks appear after the paint dries, you may need to lightly sand and touch up the affected areas with a new coat.
4. How long should I wait between coats of paint?
The waiting time between coats depends on the type of paint you’re using, the temperature, and the humidity levels in your space. Typically, you should wait between 2 and 4 hours before applying a second coat. However, it’s crucial to always refer to the manufacturer’s instructions, as some paints may require more or less drying time. If you apply the second coat too soon, you might disturb the first layer, resulting in an uneven finish. If you wait too long, you might end up with lap marks. A quick touch test can help you determine if the surface is dry enough for a second coat—if it feels dry to the touch, you’re good to go!
5. Should I use a primer?
Yes! A good primer is essential for a flawless finish. Primer helps paint adhere better to the surface and creates a smoother base. It’s particularly useful when painting over dark colors, stains, or new drywall. Primer also reduces the number of coats of paint needed, saving you time and money in the long run. There are different types of primer available, such as tinted or white primer, and choosing the right one can improve the color payoff of your topcoat. Always use a high-quality primer for the best results.